Essential Preparations Before Installing a Bull Bar
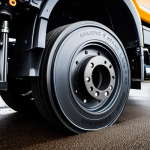
Before beginning any bull bar installation, conducting thorough vehicle preparation is crucial. The first step involves assessing your vehicle’s compatibility with the bull bar model, ensuring it aligns with the manufacturer’s specifications. This avoids fit issues and potential safety risks.
Next, gather all necessary tools and supplies. This includes wrenches, mounting brackets, bolts, and safety gear. Having everything on hand streamlines the process and prevents interruptions.
In the same genre : Essential Safety Guidelines for Installing High-Speed Rear Spoilers on Performance Vehicles
Equally important are pre-installation steps like clearing the work area and employing proper lighting to maximize safety and efficiency. Confirm that the workspace allows easy access to the vehicle’s front end without obstructions.
Review all safety equipment beforehand. Use gloves, eye protection, and ensure the vehicle is stable, often using wheel chocks. This precaution safeguards both the installer and the vehicle.
This might interest you : Ultimate Guide to Perfecting Tire Pressure for Sports Cars on Wet UK Roads: Expert Tips for Performance and Safety
In summary, the bull bar installation checklist focuses on three pillars: verifying vehicle compatibility, assembling the right tools and equipment, and establishing a safe, well-organized workspace. Proper preparation lays a solid foundation, facilitating a smooth and secure installation process.
Essential Preparations Before Installing a Bull Bar
Before starting the bull bar installation, a bull bar installation checklist is vital to ensure a smooth process. The first pre-installation step is to assess vehicle compatibility and consult the manufacturer specifications carefully. This ensures the bull bar fits your specific make and model, preventing costly mistakes or damage.
Next, gather all necessary tools and installation supplies. Common tools include wrenches, screwdrivers, and torque wrenches, which help achieve a secure attachment without over-tightening. Having these at hand streamlines the job and avoids interruptions.
Vehicle preparation also involves reviewing safety equipment and arranging a tidy workspace. Use gloves and safety glasses to protect yourself, and clear the area to avoid tripping hazards. Additionally, ensure the vehicle is parked on a level surface and powered off to minimize risk during installation.
Completing these pre-installation steps reduces errors and streamlines the mounting procedure. A well-prepared vehicle and setup lower the chances of damaging sensors or brackets during the process. Taking these preparatory actions shows clear respect for both your vehicle’s integrity and your safety.
Step-by-Step Bull Bar Installation Process
Carefully following the bull bar mounting procedure ensures a reliable and safe setup. Start by removing any obstructions around the vehicle’s front end. This means detaching factory-fitted accessories or trimming plastic panels carefully to expose the mounting points. Proper vehicle preparation here promotes a clean, stable base for attachment.
Next, position the bull bar accurately. Align it with the chassis mounts according to the included instructions. Use the bull bar installation checklist to confirm compatibility and proper fit. Precise alignment prevents undue stress on mounting brackets that might cause damage or failure later.
Secure the bull bar using recommended fasteners—usually bolts with washers and lock nuts. Employ secure attachment methods by tightening bolts gradually and evenly, following the torque specifications from the manufacturer. This balanced tightening avoids warping or misalignment.
Finally, verify stability by physically checking for movement or gaps after installing. Confirm that all bolts are tight and that the bull bar is firmly attached. This thorough inspection is part of the bull bar installation checklist to guarantee long-term durability and safety for your vehicle.
Step-by-Step Bull Bar Installation Process
Installing a bull bar requires careful attention to each stage of the bull bar mounting procedure to ensure a secure and lasting fit. Begin by removing any obstructions such as factory trim or splash guards that could interfere with mounting points. Clearing these areas simplifies access and prevents damage during installation.
Next, focus on aligning the bull bar precisely with your vehicle’s designated attachment points. Accurate alignment is crucial to avoid uneven stress that can compromise the bar’s integrity and safety performance. Use the manufacturer’s guidelines to position the bull bar correctly before fastening.
When it comes to securing the bull bar, employ secure attachment methods such as appropriate bolts and torque specifications. Over-tightening can damage components, while under-tightening risks loosening during use. A torque wrench is recommended for precision, ensuring connections meet the required standards.
Finally, verify stability by gently rocking the bull bar and checking all fasteners for tightness. This step helps identify any loose fittings early, reducing the risk of failure. Following each stage systematically guarantees a robust and professional installation, enhancing both your vehicle’s protection and appearance.
Essential Preparations Before Installing a Bull Bar
Proper vehicle preparation is fundamental to a successful bull bar installation. Start by assessing vehicle compatibility with the bull bar model. Consult the manufacturer specifications carefully to confirm the exact fitment; this prevents alignment issues and the risk of damaging mounting points during installation. Such thorough checks are the cornerstone of a reliable bull bar installation checklist.
Gather all essential tools and supplies before beginning. Key items typically include wrenches, socket sets, torque wrenches, and mounting brackets. Having these ready streamlines the workflow, avoids unnecessary pauses, and ensures each step can be performed correctly. Missing tools often lead to rushed work or improper tightening, so this is a critical pre-installation step.
Establishing a safe, well-organized workspace is equally important. Clear the area of obstacles and ensure sufficient lighting to minimize risks. Use appropriate safety gear such as gloves and eye protection. Additionally, secure the vehicle using wheel chocks on a level surface to avoid movement. Incorporating these elements into the bull bar installation checklist not only protects the installer but supports precise, damage-free mounting.
Essential Preparations Before Installing a Bull Bar
Effective vehicle preparation is key to a successful bull bar installation. Start with assessing vehicle compatibility against manufacturer specifications. This step ensures the bull bar fits correctly, preventing damage and safety risks.
Next, consult the bull bar installation checklist focused on assembling all necessary tools and supplies. Essential items typically include torque wrenches, mounting brackets, bolts, washers, and safety gear. Having these materials ready simplifies the workflow and mitigates delays.
The final pre-installation step involves reviewing safety procedures and optimizing the workspace. Arrange a clean, well-lit area with ample space to access the vehicle’s front end. Use wheel chocks to stabilize the vehicle and put on gloves and eye protection before beginning.
Incorporating thorough pre-installation steps not only protects you but also safeguards your vehicle’s components from accidental damage. A meticulous approach reduces the likelihood of errors during the mounting process, contributing to a more durable and properly aligned bull bar setup.
Essential Preparations Before Installing a Bull Bar
Before beginning any installation, thorough vehicle preparation is crucial to a smooth and safe process. The initial step involves assessing vehicle compatibility carefully. Consult the manufacturer’s specifications to verify that the bull bar model matches your vehicle’s make and year. This prevents fitment issues and potential damage to mounting points during installation.
Next, compile a comprehensive bull bar installation checklist to ensure all necessary tools and supplies are at hand. Typical items include socket wrenches, torque wrenches, mounting brackets, and fasteners. Having these tools ready avoids delays and helps maintain correct tightening, which is essential for safety and durability.
Equally important are pre-installation steps to establish a secure, efficient workspace. Clear clutter and ensure adequate lighting for visibility. Use protective gear such as gloves and safety glasses for personal protection throughout the install. Position the vehicle on a stable, level surface, employing wheel chocks to prevent movement.
Additionally, double-check that all electrical components or sensors near the mounting areas are noted to avoid damage during bull bar installation. These pre-installation steps combined create a foundation that supports a precise, risk-reduced, and professional-quality attachment.
Essential Preparations Before Installing a Bull Bar
Proper vehicle preparation is foundational in the bull bar installation checklist to ensure a smooth, safe process. Begin by thoroughly assessing vehicle compatibility against manufacturer specifications. This step confirms that the bull bar is suitable for your specific make and model, preventing misfit issues and damage during mounting. Precision here reduces installation errors significantly.
Next, gather all necessary tools and installation supplies before commencing work. Essential items typically include torque wrenches for accurate bolt tightening, mounting brackets tailored to your vehicle, bolts, washers, and safety gear like gloves and eye protection. Having everything prepared avoids workflow disruptions, allowing you to focus on the technical aspects without pause.
Review your workspace for a safe, organized environment. Clear the area to eliminate tripping hazards and ensure adequate lighting for visibility. Position the vehicle on a level surface with wheel chocks to prevent movement. These pre-installation steps are critical for safety and help maintain vehicle integrity during installation.
Including each of these elements in the bull bar installation checklist not only safeguards you but optimizes the mounting procedure, promoting durability and secure attachment of your new bull bar.
Essential Preparations Before Installing a Bull Bar
Before starting a bull bar installation, thorough vehicle preparation is essential. First, assess vehicle compatibility by reviewing manufacturer specifications closely. This step ensures the chosen bull bar matches your vehicle’s make and model, preventing misfits or damage during installation. Incorrect compatibility can lead to mounting point stress or alignment issues.
Next, create a detailed bull bar installation checklist to gather all necessary tools and supplies. Essential items typically include torque wrenches, socket sets, mounting brackets, bolts, and washers. Having these tools organized ahead reduces delays and ensures proper fastening according to manufacturer torque guidelines, critical for vehicle safety and durability.
Equally important are pre-installation steps for safety and workspace setup. Arrange a clean, well-lit area free from obstructions to allow easy access to the mounting points. Employ safety gear such as gloves and eye protection to guard against injury. Stabilize the vehicle by parking it on a level surface and using wheel chocks to prevent movement. Additionally, inspect nearby electrical wiring or sensors to avoid accidental damage during the process.
Combining these preparation measures creates a solid foundation for a secure, precise, and efficient bull bar installation that protects both installer and vehicle.
Essential Preparations Before Installing a Bull Bar
Thorough vehicle preparation is critical in the bull bar installation checklist to ensure a smooth and safe procedure. Begin by carefully assessing vehicle compatibility with the bull bar model using manufacturer specifications. This confirms that the bull bar matches your vehicle’s make and year, preventing mounting issues and potential damage to chassis components.
Next, gather all essential tools and installation supplies. Typical items include torque wrenches, socket sets, mounting brackets, bolts, washers, gloves, and safety glasses. Having these prepared ahead avoids interruptions and helps maintain proper tightening, which is vital for a secure attachment.
Reviewing safety equipment and workspace setup is equally important. Ensure the area is clean, well-lit, and free from hazards. Position the vehicle on a level surface and use wheel chocks to prevent movement during installation. Wearing gloves and eye protection safeguards against accidents when handling sharp or heavy parts.
Incorporate detailed pre-installation steps such as double-checking for sensitive sensors or wiring near mount points to avoid damage. This comprehensive approach to vehicle preparation and the bull bar installation checklist lays a solid foundation for a precise, secure, and damage-free installation process.